Knowledge Hub
part.io: Creating a User Account
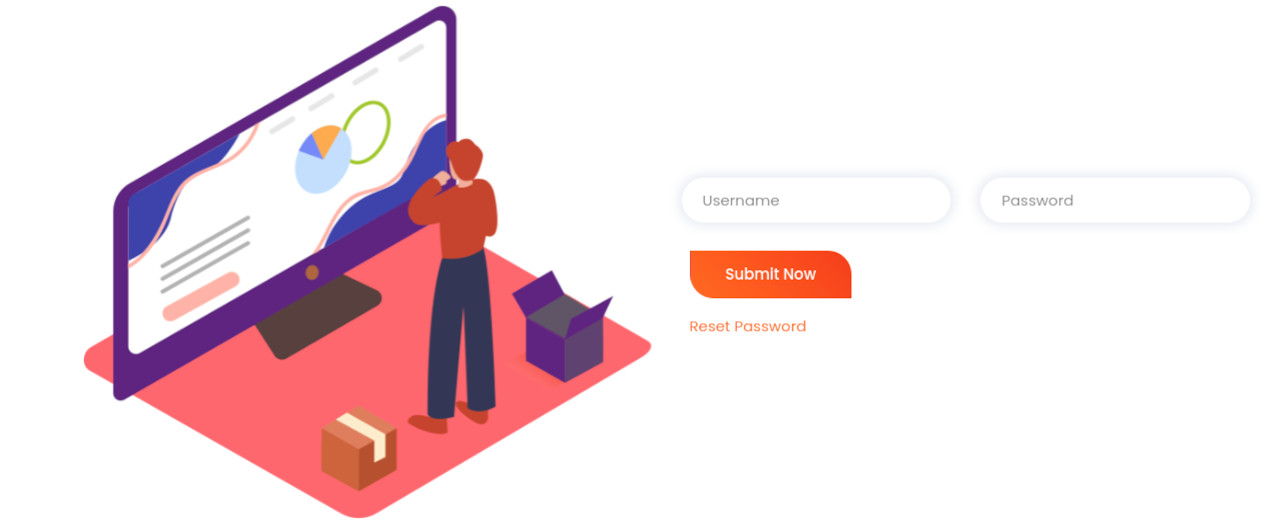
The very first step in using the part.io system is to create a user account and booking one of our plans - most likely the Basic Plan in the beginning. You can create the user account with only your email address, your full name and your self selected password here:

After you have completed this information and hit the "Submit Now" button, we send you an email containing a link. In order to verify that you are indeed the owner of the given email address, you need to click on that link to activate your account. After that click, you can log on with the password you have selected here:
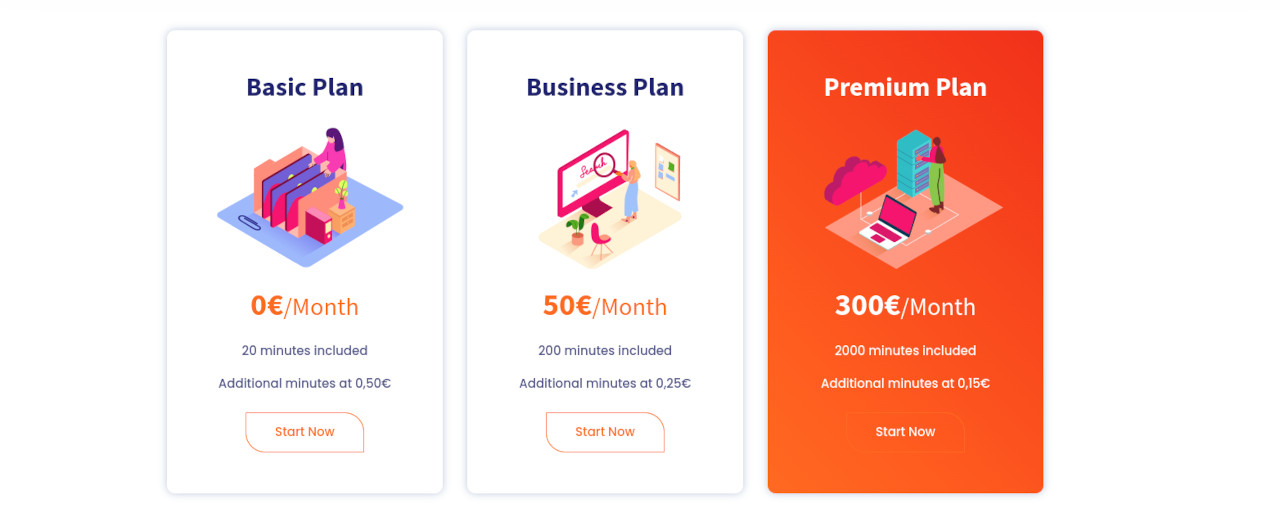
Once you have successfully logged on to part.io you can already start using the system in test mode. If you want to remove the Testmode's watermark and resolution limitations, you need to select one of our plans. Pricing is really simple: The Basic Plan is free of charge and allows you to generate 20 minutes of video material. Additional minutes are priced at 0.50€ each. The Business Plan comes at 50€ per month and includes 200 minutes. Additional minutes are priced at 0.25€ each. The Premium Plan is 300€ per month and includes 2,000 minutes. Additional minutes are priced at 0.15€ each. Just select the plan that fity your requirements and hit the "Start Now" button:
This will take you to our payment partner Stripe where you will be asked for your payment details. Important: We only askfor your credit card details. If you need your full billing address on your invoices, please add the information through our Billing Center as described right below.
With the subscription through Stripe your account is set up and all ready to go.
part.io: The Account Interface
Once you have successfully created your account the system is usable. Right after login you are directed towards aour Account page:
-
Account (that's where you start). Here you see the email address you're currently logged on with and the plan you're currently on. You also see the status of your test minutes and the monthly usage limit you have set. Both are powerful tools to give you full control over how you use your part.io account to it's full extend.
-
Jobs shows you a list of all your jobs inlucig an ID, a status message (clickig on this shows you the API/JSON statment and allows you to reopen this job in the Graph Editor (see below)), the time when the job has been created, and a download link for the finished video.
-
Billing Center takes you to our service provider Stripe that gives you an overview on any billing related issues such as your payment method, your billing address and past invoices.
-
Assets gives you an overview on the assets (i.e. your 'raw material') availabe for your account. You can connect your part.io account with Google Drive, allowing you to access all content you have saved in Google Drive. You can upload additional assets here as well as get an overview of all your uploaded assets.
-
Graph Editor open an editor allowing you to define a new job. For most users this should be where the actual work is happening. You can select your assets and connect them through the various editing options that part.io offers. In our Knowledge Hub we have a detailed description of all part.io elements. If you are just not 100% sure how one thing works or what the variables of the other do exactly - this technical specification is the place to look for answers. Second, we added and keep on adding best practices to the Knowledge Hub. Here, we pick up topics that we believe to be of interest for most of the part.io community. The threads range from how to achieve a certain thing in part.io to creative ideas what can be done with part.io.
-
API opens the page for those of you who use part.io mainly through the API. Here you can submit jobs directly as JSON query and see all the API tokens that you have created.